Texture Baking with Blender 2.56
Baking is a great feature in 3d programs that allows you to change pixel information in the texture. This speeds up lighting and other calculations like ambient occlusion during run-time. Why use this when you can add lights to Unity? If you are like me and are working with the indie version, you can’t cast shadows from any of your light sources. What is the difference? Look below.
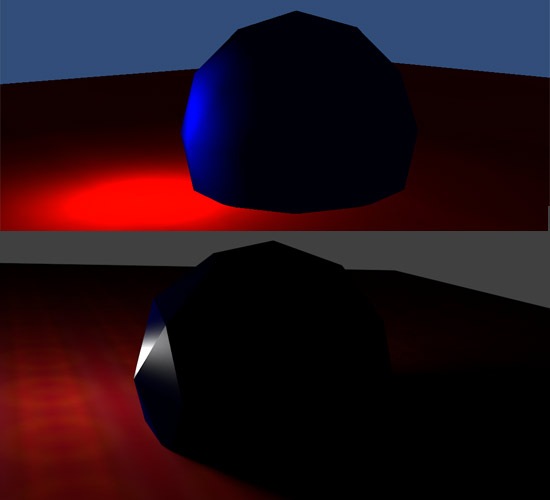
Notice the shadows being cast and how big of a difference it makes. The top example is rendered in Unity alone, and the bottom example is rendered in Blender alone. Unity does smoothing for low-poly meshes, so that is why the sphere looks so faceted in Blender. In the indie version of Unity, objects can’t cast shadows. This means that scenes will look like the image above if you use Unity’s lighting alone. There is no shadow behind the sphere!
This is why texture baking is a nice feature for 3d modeling applications like Blender. You can cast shadows from objects while still using the indie version of Unity. The only caveat is that your objects should be static. Static objects are those that don’t EVER move in your scene. Since the lighting will be baked(saved on the texture) of the the object, it won’t update new shadows if you move your objects. So how can we do this with the new Blender version?
Time to Bake in Blender
It sounds like were cooking. Let’s go!
- Start a new Blender file ( File > New)
- Delete the cube (highlight it with context click and click “x”)
- Create a sphere and a plane on your scene. Position it similar to the image above. Blender calls spheres “ico spheres” . Here is my setup below
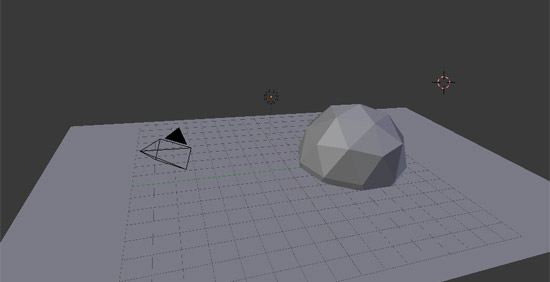
Right now, these objects don’t have any materials on them. Pretty soon, I am going to do a UV unwrap with each object (plane and sphere). This is because pixel information is very important with baking. Since casting shadows is very exact, precise pixel placement is important when the lighting gets saved(baked) on to the texture.
- Select the sphere and go into edit mode.
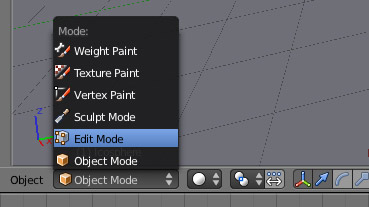
-
Press Control + Tab. This will bring up an option for mesh selection. Select “edges” from the list. We are going to create a seam to make the UV unwrap better.
-
Highlight edges going around the sphere (orange). Press Control + E. Select the option “Create seams”. This is where the UV unwrap will know where to cut the polygon when it puts it on a texture.
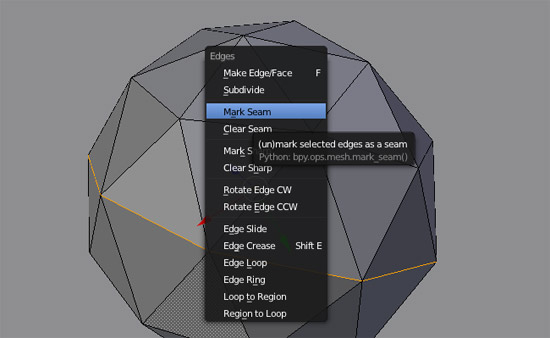
-
Press “a” twice. This will deselect your selection and then select the whole mesh. Press “u” and then click “Unwrap”
-
If you go into the object data tab of properties window, you can see the UV data attached. Hovering over tabs tell you what it is.
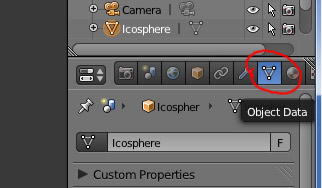
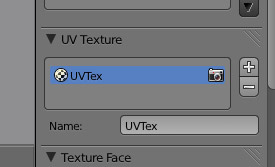
I renamed the default “UVTex” to something more meaningful like sphere test texture.
-
Change the layout to UV unwrap to see everything better.
-
Create a new image in the UV editor and change the size to 256x256. I made mine teal. Save the image as a jpg. Save the scene if you haven’t already. You can create a bookmark location for all of your saving the blender UI for easy access.
-
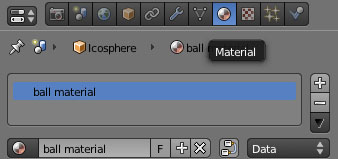
Go back to the default layout and go to the “materials” tab. Create a new material and call it ball material. These materials is what Unity uses as well to apply textures, UV data, and other object information.
-
Go to the “textures” tab and create a new texture. Blender will automatically link the texture to the material you made. Change type to “image or movie”.
-
Under the image dropdown, click open and pick the image we just saved to the hard drive
-
Under the mapping dropdown, click UV. What you have done is apply the texture we created to the object
-
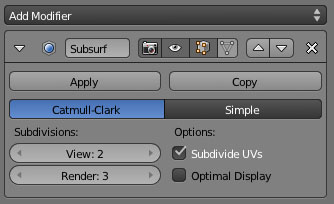
Add a subdivision surface modifier on your sphere so the lighting will be smoother. Make it similar to the settings below. Don’t apply them. This is just to smooth the lighting on the mesh since it is low-res. If you try to bake it without this step, the lighting will be very faceted(unless you want it to look like diamond). You could probably increase the Render setting higher if you want the lighting to be even smoother. Notice the Subidivide UV option that is checked.
-
Do steps 3-13 for the plane. Don’t worry about creating seams for it since it is just a plane. If it was a complicated object, you could create seams for it for the UV unwrap. Still select everything and do the unwrap. It will just be a square, and that is ok.
-
For the plane, you can go into the materials tab and set the specularity to 0. This will take away the glare if you try and render the image. Here is what mine looks like so far.
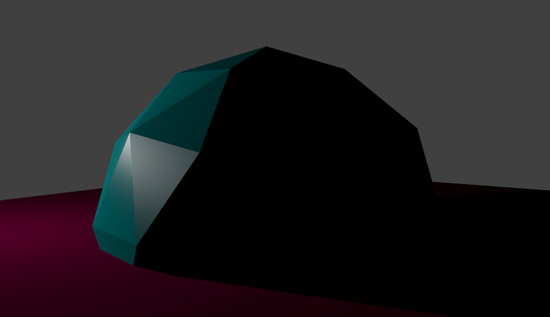
Our textures still aren’t baked. We just set them up with the materials. I think it is a good idea to keep your regular texture separate from your baked textures. That way it will be easy to make changes if you mess anything up.
-
Make sure both sphere and plane are selected. Go to the Render tab and click on the “Bake” dropdown.
-
Click Bake Mode: Full Render, then click the Bake button above it.
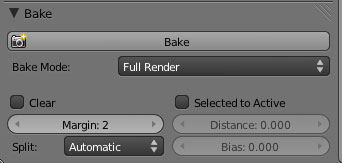
- Go into the UVLayout mode where you see the unwrap. You will see that the image changed with the new data. Save those images as “baked” versions to your hard drive. You are done with your baking!
Further Tips and Unity3d
Blender only will bake objects that are selected. You can also play around with other types of baking like ambient occlusion to see what they do. After you bake something, it changes the image data in Blender. If you try to bake again using other settings, it will apply it on top of the already baked image. You have to re-import your original image to the textures tab if you mess anything up.
If you want to bring it into a game engine like Unity3D, you can use the baked textures as your normal texture. Since the image data stores the lighting, You don’t have to do anything special to make it work. Just import the assets and apply the textures. I added a directional light to the scene for the ambient light. Since your light isn’t real on the texture, you still need an ambient or directional light to light the scene up as a whole. Here is my final example below.
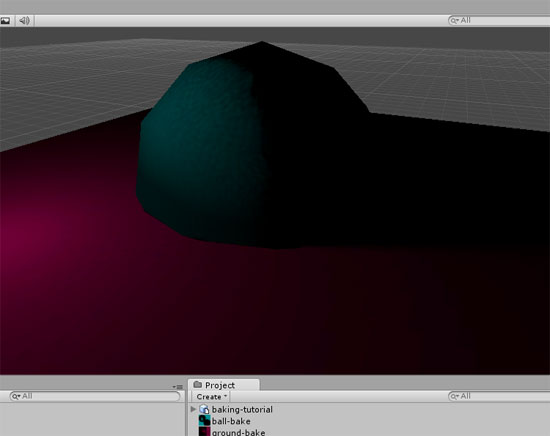
This example has only two objects, but it extends to any number of objects. Scenes can really look cool if you have all kinds of objects and lighting. You can achieve lighting in Blender that you can’t replicate in an indie version of Unity3d.
We have gone over how baking works in the new version of Blender. Hopefully this will give you some courage to try it in your next project if you haven’t been already.
Page Contents

I mostly keep this blog to help me remember things. Writing is also a great way to understand things at a deeper level. I would highly recommend it if you don't write at all.